If you’re looking for a support ticket plugin that is easy to use and versatile, look no further than Support Genix. In this comprehensive guide, we will show you How to Use Support Genix for WordPress and use this plugin to manage your support tickets via WordPress. We’ll also go over some of the features that make Support Genix the best choice for your business.
What is Support Genix and what are its key features
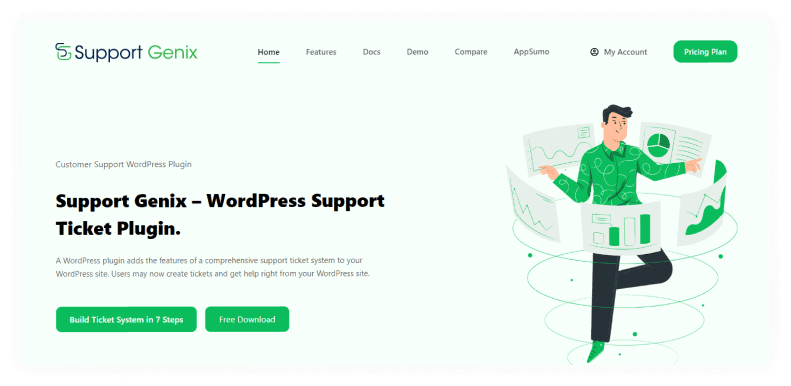
Support Genix is a support ticketing system that offers unlimited tickets, agents, and customers. With this tool, you can create tickets on behalf of users, and agent control ensures that only authorized agents can view and respond to tickets.
In addition, Support Genix offers a variety of features designed to streamline the support process, including a knowledge base, self-service portal, and live chat.
Moreover, with Support Genix, you can transfer tickets between support agents, pipe in email messages from customers, integrate with envato, and Elite Licenser Integration. There are also file upload settings so that you can easily attach files to support tickets. As a result, It provides an all-in-one solution for managing your customer support.
How to set up a support ticket system with Support Genix
By purchasing this plugin from the website, you can gain access to all of the features and benefits that Support Genix offers.
How to install and activate Support Genix
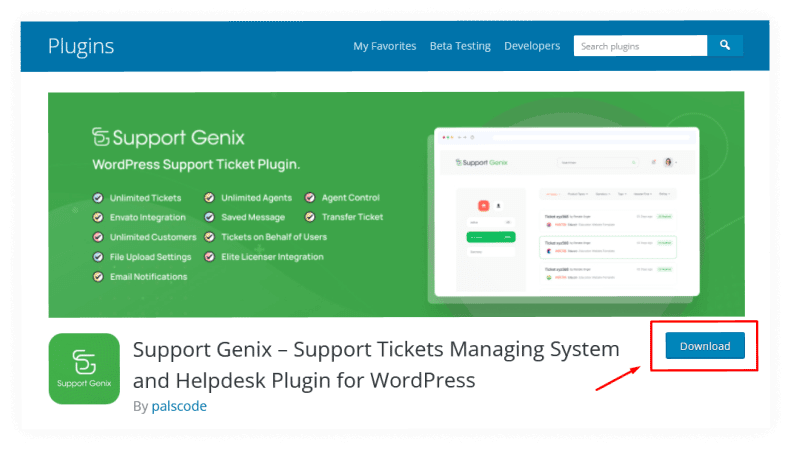
Simply download the Support Genix WordPress plugin from the website’s download page to get started. After purchasing it, you can find the file under “Download.”
Download the plugin from the download page.
URL: https://wordpress.org/plugins/support-genix-lite
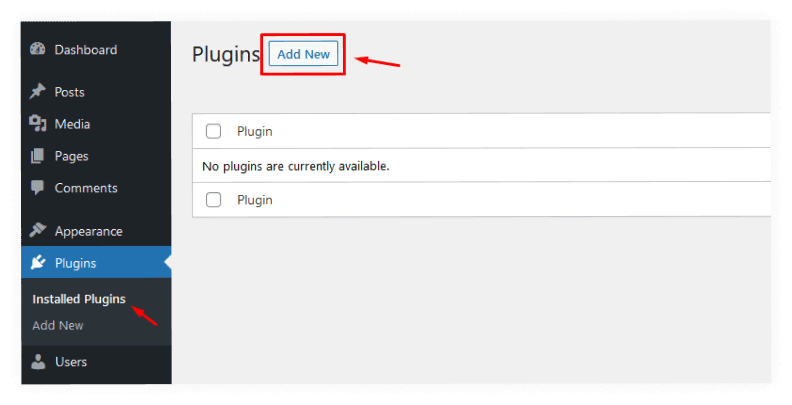
Go to your WordPress Dashboard > Plugins > Add New
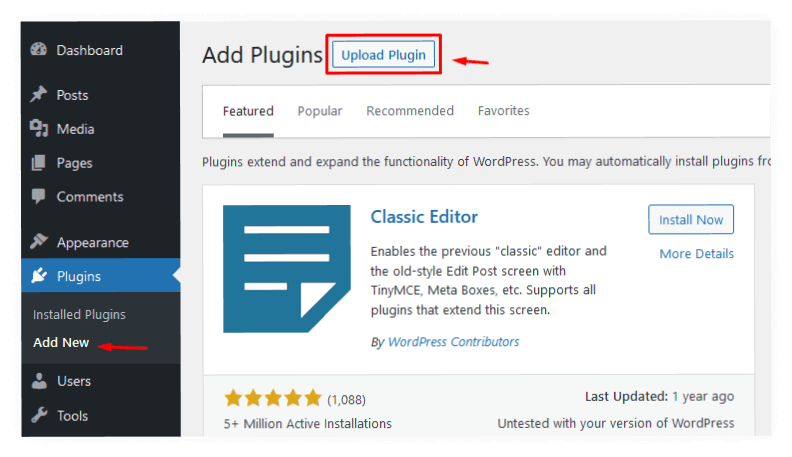
Click on the “Upload Plugin” button
Choose file and click on the “Install Now” button.

Activate the plugin.
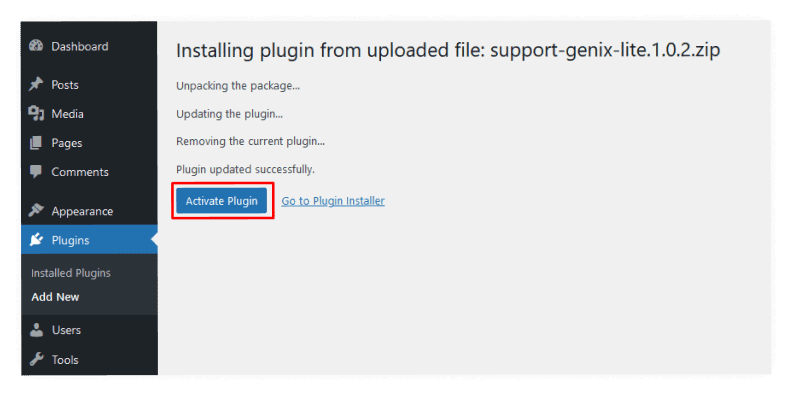
You will need to add the license key that you can find on the license page.
How to Use Support Genix for WordPress
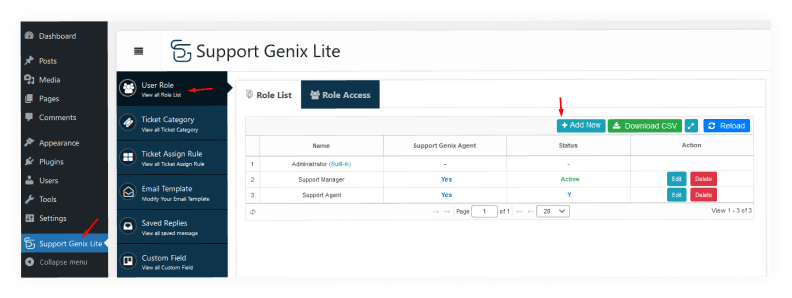
First of all, you have to go to the menu of the Support Genix plugin and then move on to the User role setting menu. From there, you can add, modify, and delete any category. If you need to edit or delete a user role, there is an option.
You can also create custom roles based on your requirements. By default, Support Genix provides two roles: Support Manager and Support Agent. As a Support Manager, you can manage all tickets and delete and restore them. However, as a Support Agent, you are not able to delete or restore a ticket. You can quickly change the permission by clicking the icon in the role column.
You can also add a new role from this menu. To add a new role, click Add New and provide the name of your choice. Make sure it’s set as a Support Agent so that you can keep track of who does what in case any issues come up with support tickets or calls for help!
Creating Support Agent
If you’re familiar with WordPress, then creating a support agent or manager in SupportGenix is a piece of cake.
Simply navigate to the WordPress Dashboard, click on Users, and then click on Add New. From there, you can select the role of the new user: support agent, manager, subscriber, contributor, author, or editor. Once you’ve made your selection, simply click on the Add New User button and you’re all set!
Assigning a Specific Role to a specific category
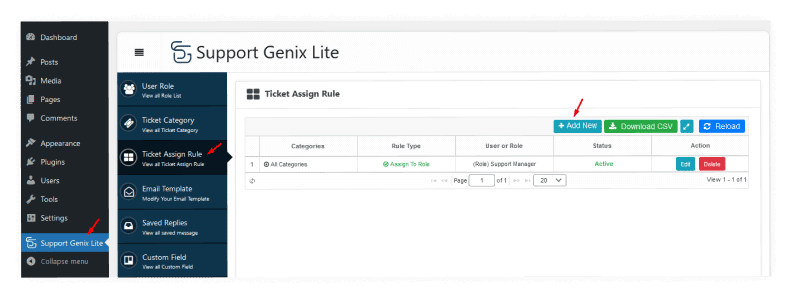
You can assign tickets to roles using the platform Support Genix. You can assign the tasks associated with a ticket while still maintaining control over its execution by assigning it to a role. You can also create custom roles and apply them to particular tickets using this tool.
Just head to the Settings tab and click on Ticket Assign Rule. From there, you can choose how you want your tickets to be assigned. You can choose to have them assigned randomly, by a team member, or by a Support agent.
With the Support Genix setting, you can create a rule that automatically assigns tickets to the support manager when they are created. This tool helps to keep your support team organized and ensures that all tickets are properly categorized. The Support Genix setting also allows you to assign tickets to specific roles based on the category of the ticket.
Editing Email Templates
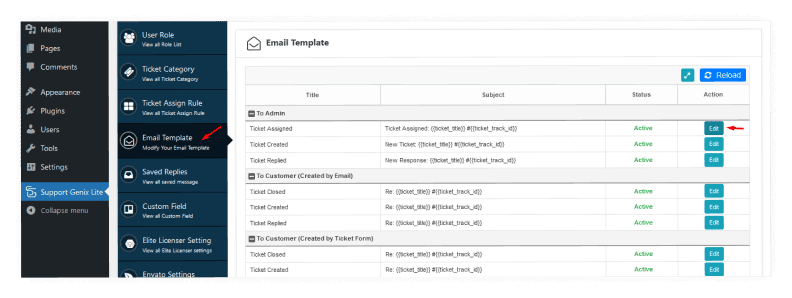
Support Genix has 9 email templates to send to admin, ticket manager, ticket agent, and customers. Whether you’re looking for a way to streamline your support process or just need a little inspiration, the templates are a great place to start.
Just select Email Template from the Settings tab. The template can then be changed to better fit your requirements.
You can easily turn on or off, and edit your email notifications based on your requirements. This tool makes it easy to take control of your email inbox and keep your inbox clean and organized.
Managing custom fields
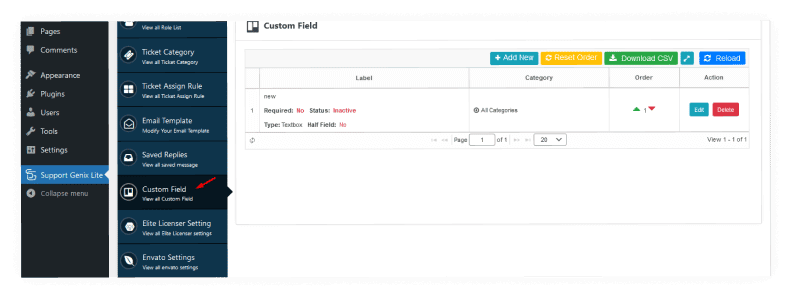
You can make custom fields for your ticket open/registration page using the useful tool. This will enable you to collect more information from your clients as they create tickets, ultimately reducing the number of chats required to resolve a ticket.
Simply navigate to the Settings tab and select Custom Fields from the menu. From there, you can add, edit, or delete custom fields as needed. Custom fields can be added to both the ticket open form and the registration form. They’re a great way to collect additional information from your users, and they can be customized to support any data type that you need.
Additionally, with the flexible support options, you can choose to create a support system that is exclusive to admin and agents, or one that is open to both agents and customers. The field types of Support Genix support all of the custom fields, and they can be required or optional. The most common field types are text boxes, numeric, date, switch, radio, dropdown, instruction text, and URL input.
Using Shortcodes
Shortcodes are a handy way to add support for Genix products to your pages and posts. To use them, simply create a new page or post, then paste the relevant shortcode into the content area.
If you want a hassle-free experience, we recommend using a theme that closely resembles your desired design. Of course, you’re welcome to use any theme you want. However, the page layouts and addition of custom CSS may still need to be changed.
Enabling Email-based support ticket or Email Piping feature
The Support Genix plugin is a handy tool that can help you keep track of all your support emails. With email to ticket mode enabled, any email that a client sends to a specific address will be turned into a ticket. This can help you avoid the risk of forgetting to reply to an important email.
You can choose Email to ticket from the menu by going to the Settings tab.
However, with this plugin, you can enable the Email-based support ticket or Email Piping feature. Just follow these simple steps:
1. Click Add new button to Add Email Account.
2. Add Hostname, Email ID, and Password.
3. Assign this email to all categories or specific categories.
FAQs about Support Genix
- How many tickets can I buy?
You can buy any number of Ticket. There is no limit.
- What industries are SupportGenix most suitable for?
All sizes of companies can utilize SupportGenix to offer efficient customer assistance. In a matter of minutes and with just a few easy actions, you’ll have your own special gateway for responding to client inquiries.
- Will it cause WordPress to have a performance issue?
Absolutely not! This plugin was developed with performance in mind and won’t slow down your website.
Final Thoughts
In conclusion, we highly recommend Support Genix to anyone who is looking for a reliable WordPress support service. They are quick to respond to any issues you may have, and they are always willing to go the extra mile to help you resolve your problem. They have a wide range of plans to choose from, so you can find one that fits your needs and budget. And if you’re not satisfied with their service, they offer a money-back guarantee. So what are you waiting for? Sign up today and see for yourself how Support Genix can help you take your WordPress site to the next level.